


Well, folks, it looks like the cold weather is officially here, and that means I have about four months of cold hands and feet to look forward to. Yay…
It’s kind of hard to enjoy the beauty of winter when all I want to do is stay in bed wrapped up like a toasty cinnamon bun.


Thankfully the DIYs on this list will keep you warm AND stylish so you can actually enjoy winter for once.
Upcycled floor mat

Is there anything worse than waking up in the middle of the night to go to the bathroom, only to have your feet land on the cold floor? It sends a shiver down my spine just thinking about it.
With this project from Hannah In The House , you’ll make a cozy floor mat from old t-shirts.
To start, you’ll need a hula hoop, fabric scissors, and two or three t-shirts.
Begin by cutting your shirts into a continuous ribbon that is about 2 centimeters wide.
Use the hula hoop as the base to help you shape your mat.

Tie a few strands to the rim of your hula hoop in a starburst formation. Beginning at the center, start weaving with your ball of t-shirt yarn.
This is basically the process until you are happy with the size of your rug. To finish the rug, crochet two rows for a decorative trim.
Now your feet will stay nice and toasty, and since this is so easy to make, you can add one to each room of the house.
DIY boot socks

Sometimes, you just need an extra layer to keep your calves and feet warm. Plus, these boot socks from My Sister’s Suitcase look so cute and add a little country coziness to any pair of boots.
This is also another project where you can upcycle some old sweaters, or head to Goodwill and pick some up for cheap. The options are really endless with this project which is why I love it so much. Ready? Let’s get started.
Cut the sleeves off of your sweaters. Where you cut the sleeves will depend on how long you want the socks.

For these longer socks, the cut was made after the seam that attaches the sleeve to the body of the sweater.
Once you have your sleeves, you can have fun embellishing them with a lace or crochet trim. Fire up your sewing machine and add the trim to cut edge.
This project is so quick and easy, you could make a pair of socks for every boot you own. They would also make a heartwarming DIY gift.
Cozy robe

I think one of my favorite things to do in winter is to wrap myself up in a robe when I wake up and pour myself a hot cup of coffee. Mmmm… it is the best .
If you can believe it, Damask Love made a robe from a bed sheet for this project and it screams cozy!
She opted for a lightweight jersey robe, but you could easily do this project with a flannel sheet if you need the extra warmth like me.
Grab a queen-sized sheet, some pins, and your sewing machine.

The pattern of this project is fairly straight-forward and involves cutting out the shape of your sleeves. Once your sleeves are cut, you simply sew together all the cut edges.
Finally, you’ll cut open the middle of the robe so you can wear and drape it while you’re lounging on the couch. Add a decorative ribbon in your favorite color for the sash, or an iron-on design if you choose.
This is a great project for any budding sewers out there!
DIY hand warmers

Sadie Seasongoods must know that my hands are always freezing in the winter. It doesn’t matter if I’m wearing mittens or keep my hands in my pocket, they’re always cold!
If you suffer from cold hands like me, try making these DIY hand warmers. Best of all, they are reusable, so you can keep your hands warm all season long.
To begin, you will need a few 4-inch or 5-inch fabric squares. Take two squares and sew up three of the sides.
Turn the packet inside-out and fill it with rice, leaving enough space to sew up the final side.

When you’re done, pop them in the microwave for about 30 seconds to warm them up.
Stick these miracle workers in your pockets or inside your mittens for some extra warmth. They work really well when it comes to warming your hands up quickly after coming in from the cold.
If you want an extra level of comfort, you can also add a few drops of an essential oil to the rice. That way, they’ll smell and feel comforting.
Sweater pillow

This project comes to us from Rustic Crafts & Chic Decor and is another way to give an old sweater a new life.
Now, I know what you’re thinking: A pillow won’t exactly help you if you feel cold. However, I find some fabrics are much cozier than others and if you’re trying to get warm on the couch before bingeing Netflix, this pillow will do the trick.
So, grab an old sweater or one you thrifted, and get ready for a warming pillow.
Cut the tops and sleeves off your sweater below the armpit.

Stitch the cut sides together and pop in a pillow. Once your pillow is in, stitch up the bottom and… you’re done! How easy is that? I might need to make a sweater for all of my throw pillows.
Now if you’ll let me set the scene a little, imagine being curled up on the couch with a couple of these, a fuzzy throw, and maybe even a hot water bottle. You’ll never feel cold again.
Infinity scarf from a skirt

Do you ever walk by the clearance section and see things that have potential, but really aren’t your taste or style? Here’s a great way to DIY some of those items into something you’ll use to keep yourself warm. I call that a win-win.
This DIY is so fast, so I hope you’re ready. To begin, cut the waist off of the skirt. Now all you need to do is adjust the width to your preference, so cut the skirt down as much as you want.
Personally, I like my infinity scarves chunky.

Once you’re happy with the width, simply stitch up the cut edge.
My Sister’s Suitcase created this quick and clever DIY. I love how you use the existing loop of the skirt to make your scarf. Infinity scarves aren’t going out of style anytime soon, so you can whip up a couple of these in your favorite colors or patterns.
The best part about this is that you can wrap yourself up and keep the chill away. Gonna make one ASAP!
Blanket poncho

LoveSpunk came up with this stylish option for days when you want to wear a blanket in public. I love how ponchos have become the socially acceptable accessory for people who are always cold.
Find one yard of a thick, warm fabric. This project requires a little bit of sewing, but you’ll use one of your own t-shirts as the main pattern to mark the neck and armholes.
Once you’ve cut out the neck and arms, stitch up the sides of the fabric together following the dotted lines in the photo.
By now, the overall shape of your poncho is done.

All that’s left to do is add a hem to the sleeves and the neckline. This will make the poncho look a little more polished.
Besides wearing this around in the fall while sipping on a PSL, this is actually a really versatile project. You can toss one of these in your carry-on when you’re flying so you’ll have a blanket on the plane.
I would even try making this out of a terry fabric to wear for a beach cover-up. So many options, so little time to DIY.
Sequin sweater patches

Here’s a way to give an existing warm sweater a glitzy upgrade courtesy of A Pair & A Spare .
What I love about this project is how it’s a fun way to combine textures on a sweater. Also, I think we all need a little more glitter in our lives, right?
To make your patches, draw an oval shape on a piece of craft paper. Use these ovals as a pattern for your patches and pin them to a piece of sequin fabric.
When you’re ready, cut out your patches.

Now all you need to do is hand-stitch the patches on your elbows. You might need to try the sweater on to ensure that the patches are in the right place.
Even though this DIY features sequins, you could really use any type of fabric. Try it with denim, velvet, or even a fun pattern. You can instantly give any old sweater a stylish upgrade.
Most importantly, it’ll keep you warm! At the end of the day, that’s all that really matters.
Faux fur vest

Love Maegan came up with this great DIY that proves that furry vests aren’t going anywhere anytime soon. I, for one, am glad because these things are so warm.
For this project, you don’t need to lug out your sewing machine. There is a bit of sewing but it can be done with a needle and thread.
To begin, you’ll need a large square of faux fur. Fold the fabric to match the width of your shoulders and mark the armholes 12 inches from the top.
Once you cut out your armholes, you pretty much have the bulk of your vest done.

All that’s left to do is fold the edges and stitch them together to make the collar. It’s really easy.
This vest is the perfect accessory for layering on chilly days where the weather could change. Wear a few light, long-sleeved shirts underneath and wrap a scarf around your neck. You’ll be ready for whatever weather you come across, and you’ll be warm!
Is it wrong that I like this vest so much because it is the DIY version of wearing a teddy bear?
Dip-dyed sweater

DIY In PDX created this beautiful gradient sweater project. I really am in love with how it turned out. Even though this DIY can get a little messy, I think I need to try it out for myself.
You’ll need to pick up a box of fabric dye such as Rit dye, and a sweater made from a natural fiber like cotton.
Follow the instructions on your box of dye to prepare it. The dip effect comes from adding more dye to the mixture each time you dunk the sweater.
This project can be a bit more labor-intensive but the result is worth it.

This is way better than those tie-dye shirts I used to make at summer camp as a kid.
The tricky thing about this project is evenly submerging the sweater in the dye each time. Clip the sweater to a hanger and pin the sleeves to the sides to get straight lines. You might need extra clothespins if the sweater starts to sag in the middle of the hanger.
If you have a spare afternoon, give this project a try! A warm, gradient sweater can be yours if you put in the work.
Pompom blanket

Dream A Little Bigger must know that adding a pompom to anything instantly makes it cozy.
If you’re an avid knitter or into crocheting, feel free to make your own blanket from scratch. You also have the option of buying a blanket or adding pompoms to an older, beloved throw.
The main aspect of this project is actually making the pompoms. Dream A Little Bigger used a Clover pompom maker, which is a really handy tool.
You can also look up some pompom DIYs that use objects like a fork to make them.
For this project, we’re going for big pompoms.
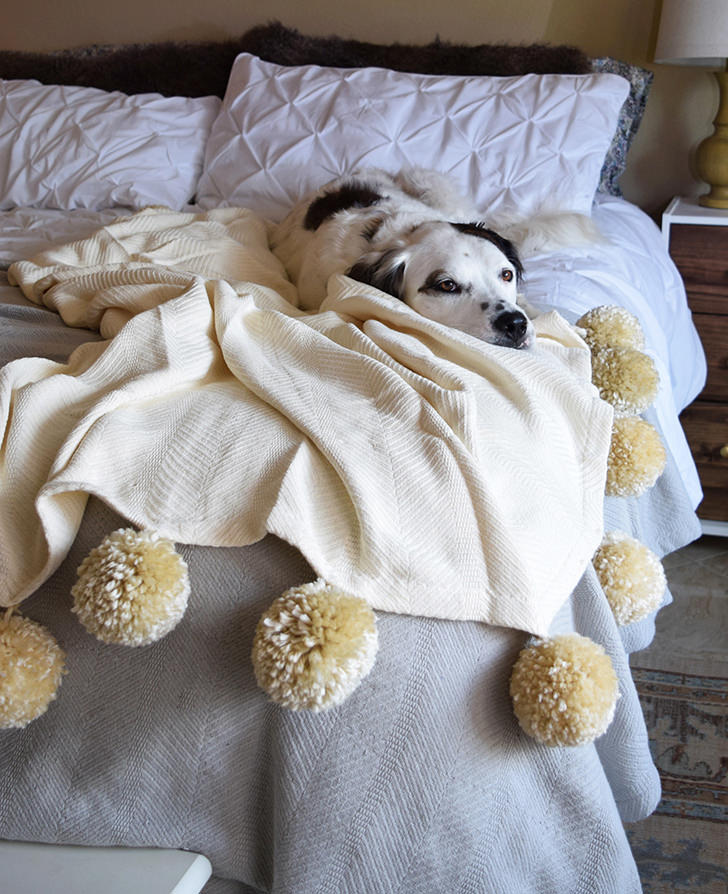
I would love to jump in that bed right now and cuddle up with that pupper.
Once you’ve made your pompoms, simply stitch them to the blanket with matching thread. The beauty of this DIY is that you don’t have to be too neat or precise with the stitches because the pompoms will cover them up.
Dream A Little Bigger only attached the pompoms to the shorter ends of the blankets, but feel free to do all four sides if you would like. You can never have too many pompoms.
Plaid blanket scarf

Blanket scarves are everywhere these days and with this tutorial, you can make one with just four materials. Four! In fact, you probably already have everything you need to make one of these beautiful scarves right now.
The main component of this project is the fabric. You’ll need a large rectangle of knit fabric that measures about 48.5 inches by 59 inches. The key is to pick a fabric that will fray easily.
When you’re happy with the size of your fabric, begin pulling the horizontal threads of the fabric to add a fringe.
You can make your fringe as long or short as you’d like. Keep pulling those threads until you like the length.

When you’re one with the fringe, just stitch the corners up to prevent any more fraying.
The Sorry Girls created this gorgeous project. You also have the option to tie the fringe together to create a knot-fringe for a little extra texture.
When your scarf is ready, you have a couple of options to wear it. You can simply wrap it around your shoulders for a shawl, drape it around your neck for an open scarf, or wrap and tuck it to create a bunched (and warm!) look.
